Wednesday, December 14, 2011

Homebrew Home Improvement Part 1

As mentioned before in an earlier blog entry I had a to do list. After checking off #1 of brewing more beer I decided to tackle #2, install a false bottom in my kegerator. Doing this would allow for me to store up to 4 kegs in the fridge and still leave room for bottle storage. Some of you may be asking, "Why install a new bottom, mine has a shelf?". This is a good question. If I had kept the stock shelf in the fridge it would have cracked under the weight of 4 loaded kegs.

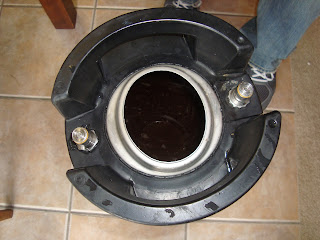
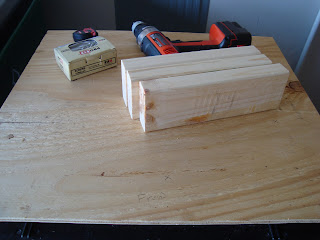
Saturday proved to be a great day. The weather was perfect so I headed out to Lowe's to pick up a 2x4 and a sheet of plywood. Once all the supplies were picked up I set to installing the false bottom. The main issue with this design was the bottom of the fridge. If you ever remove the bottom shelf of a fridge you will notice that towards the rear, the bottom rises up at a 45 degree angle. This makes it very hard to make a flat surface for the kegs. The solution was to cut the plywood to fit the inside of the fridge and make legs out of the 2x4s. See picture below for sketch of project.
This sounded easy enough and for the most part it was. Plywood was easy to cut and place into fridge. The two sets of long legs worked fine and seemed to be the correct measurement. The issue came when installing the shorter set of legs. The first attempt resulted in one leg too short and the other one perfect. When I went to recut another leg the battery on the saw died. After waiting another 30 minutes there was enough juice to finish the cut and attach the leg. After sliding the base back in, the keg sat in the fridge nicely. Best part? Under the base there is enough room to store bottles.


With this task scratched off my list all I need is three new corny kegs and the equipment to hook them up and install them. But that is for part II, till then, Prost!

Saturday, December 10, 2011

Ryen’s Pale Ale Brew Day

This post can simply be summed up in the phrase: RDWHAHB. No I didn’t hit my head on the keyboard and post what came out. RDWHAHB is an acronym that stands for “Relax, Don’t Worry, Have A HomeBrew”.  If I had done this write up immediately after brewing it might have just been titled ”Lessons Learned”, thankfully a couple days and a couple homebrews later everything seems to be working out.
We brewed on Thursday night and for the most part everything went well, better than expected in fact. Taking in lessons from last time I created a “Brew Cheat Sheet” for our schedule and laid out all the ingredients and materials in the order we would need them.
Everything went great, even though we changed a couple of things from the first brew. First, since this was a partial mash we needed to add extract. After doing some research online I decided to add it in the last 15 minutes of the boil to get rid of the “twang” that often accompanies the use of extracts. Secondly I added in a Whirlfloc tablet to clear the beer, because pretty beer is good beer. Finally and most importantly, I used my new Christmas gift, a Wort Chiller. A wort chiller looks like a copper spring that sits in the wort, cold water runs through it and cools it faster. If I had known how much ass this thing would kick I would have gotten it sooner. During our first brew we chilled the wort by placing it in a sink ice bath. This took about 45 minutes to cool down. With the Wort Chiller this process took 15 freakin’ minutes. So much easier and so much better.

Unfortunately that was where the good vibes ran out. After adding the wort to the fermentation bucket I need to bring the volume up to 5 gallons, this is standard. After adding in a gallon of water I took a hydrometer reading. The target Original Gravity for this beer is 1.053, the reading was 1.042, this was bad, very bad. For most reading you might say .011 is pretty close, unfortunately this is not the case. If you were playing football this would be equivalent to kicking a field goal and nailing your coach in the head. Although this was bad it was still ok, the beer tasted fine it just wouldn’t be as strong, that is doable.

Before sealing up the fermenter and waiting for beer to form I needed to add in yeast. For this brew I decided to use liquid yeast from Wyeast. This came in a “Smack Pack” where you have to hit the packet to activate it. The morning of, I took the packet out and smacked it. When it came time to dump the yeast into the fermenter I noticed that the pack had not inflated all the way and as I poured out the yeast, I could diffidently tell that yeast was not ready to be poured but since it was already opened I had to commit.
Once I poured in the yeast and sealed the fermenter I was left to my thoughts about what I had done wrong to get the bad hydrometer reading and the poor yeast. I sat down to research both. After reading some threads on homebrewtalk.com I discovered my bad hydrometer reading was probably due to the gallon of water that I added to the wort to bring it to 5 gallons. When I took the reading right after adding the water I had not given it enough time to mix, thus giving me a bad reading. As far as the yeast, all I had seen told me to wait and that is what I did. On Saturday morning, like a kid on Christmas, I went to my fermenter and sure enough there was the tell-tell sound of bubbles. The yeast was working and everything looks to be going good.
So, after all that we come back to my original point,”When it looks to be going south, RDWHAHB”. Till the next time, Prost!

Wednesday, December 7, 2011

Coming Up Next

After the success of my last brew I decided to take a minute to figure out what my next steps were in regards to the question of "Where do I go from here?".

Obviously #1 on that list was to brew more beer so I placed an order with Austin Homebrew Supply. The order contained a couple random things (hop sacks, etc.), a wort chiller (!), and most importantly supplies for a Rye Pale Ale. I know it is winter now and most people traditionally look for something a bit darker and malty-er to warm yourself up, but what beer selection would be complete without a nice crisp Pale Ale? Amazingly enough I placed this order on a Sunday 12/4, by Tuesday 12/6 it was on my front doorstep. Now that is impressive! Now it looks I will be brewing a Ryen's Pale Ale later this week.
A couple other things that I look forward to completing in the coming weeks to upgrade the kegerator include:
  1. Installing a false bottom on the fridge for maximum space utilization. Doing this should let me store 4 kegs in the fridge. 
  2. Getting more corny kegs and more taps! Need a place and a way to dispense all that good beer. 
  3. Prepping the fridge to dispense from (hopefully) 4 kegs.  This should be fun...
Hopefully I will have a write up of how the RPA Brew Day went later this week. Till then, Prost!

Saturday, December 3, 2011

The First Pour

After weeks of waiting it is finally here! The beer is done and ready to drink! So without further interruption, the first pour:

Doesn’t it look great? The beer was a little overcarbonated but I have sincesolved that issue. More importantly though, is that how it looks is not near as good as it tastes. I will admit that I had reservations about my first batch but overall it isn’t too bad. Although most would say that it tastes like a regular Brown Ale, to me it is something more, maybe the start of something great?
Looks like this weekend will be cold and rainy, can't think of a better way to stay inside and keep warm than with a couple of these.

Thanks to everyone who has been following the blog so far, I appreciate all the reads and comments from people, keep 'em coming!
With the first beer in the books it begs the next question, what to brew next? Till the next time, Prost!

Sunday, November 20, 2011

Washers: Man’s Best Friend

The time was finally here! The curse of 1.020 had been lifted; we had hit the Final Gravity of 1.016 for three days in a row, now it was finally time to keg!
In preparation of filling the keg I planned to flush out and clean the entire tap system. This included washing the keg, cleaning the pipes, and finally sanitizing everything. The keg was easy enough to clean. Throwing in some soap, add water and shake. It is when I went to clean the keg lines that everything went terribly wrong…

To clean the lines I had to hookup the CO2 and pour a glass of soapy water from the now clean keg. Sounded simple enough right? After hooking up all the hoses I turned on the gas. First I heard the unmistakable whooshing sound of CO2 escaping. Then water started shooting out where the keg hose met the tap. As I frantically shut off the gas, Rachel opened the garage door before we passed out, probably should have done that first now that I think about it.
After re-assessing our situation we discovered that we had not put a washer where the regulator connected to the gas tank and one where the keg line connected to the tap. Now, before you judge, remember that none of the equipment I assembled came with instructions and I am one of those people who struggle to make cereal without directions. 
After a quick trip to Lowes I had the washers. Once installed the gas and water flowed like a charm. Soon the keg and beer lines were sanitized and we were finally ready to keg!


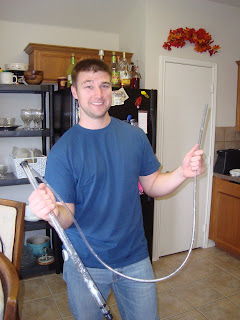
Thanks to the auto-siphon within minutes the keg was filled.
We closed it up and said goodbye for a couple of weeks while we wait for it to carbonate. Lucky for us Thanksgiving is coming up. While we are spending time away from home spending time with our families and friends the beer will be carbonating. Finally on the homestretch for the first batch, hopefully the next time I write about this beer will be a review. Till then, Prost!

Tuesday, November 8, 2011

The Curse of 1.020

Sorry for the break between posts. Not much new has been occurring and that is exactly the problem.
Up until now everything has been going great. After having a fantastic brew day and great starting fermentation something seems to have gone awry. I have encountered the Curse of 1.020.
Okay, this may get a little wordy and boring, for that I am sorry, but don’t worry! There are pictures!
A little background is needed to explain what is meant by 1.020. Beer is determined to be done fermenting by use of a hydrometer. To simplify what a hydrometer is, picture a thermometer with a longer, fatter, bottom. The hydrometer is placed in a sample of your beer and floats, or if your imagination is not quite that good, you could look at the picture below. Depending on the level the hydrometer is floating you will know if your beer is close to being done (also determines how much alcohol your beer could and does have). As the fermentation process proceeds, the hydrometer will float lower and lower till it reaches its “Final Gravity” (FG). The FG I am trying to attain is between 1.016 and 1.012. Unfortunately the reading on the hydrometer is currently 1.020 and has been for the last two weeks.
What could possibly cause such a terrible thing to happen? After researching online I have come up with a couple of different reasons.
1.       I am using malt extract and a stovetop to boil when I brew. Some of the extract may have caramelized on the bottom of the brew pot and are no longer able to be converted to alcohol by the yeast.
2.       Since I live in Texas temp can vary wildly and over the last two weeks temps outside have ranged from 90° to 30° F. While I tried to keep the temperature fairly constant I am not sure I was able to achieve this.
3.       Like the Texas A&M football team I love so much, the yeast got to halftime and quit.
So there I sat with the Curse of 1.020 hanging over my head. After researching some of the Homebrew forums I made a trip to the local homebrew store, Homebrew HQ, to see what they had to say on Saturday. They guy I spoke to suggested two options.
1.       Use something called Yeast Energizer in conjunction with gentle stirring to restart the yeast and the fermentation.
2.       If that did not work he suggested adding in additional yeast to finish the fermentation.
 Well, after getting back home we added the yeast energizer. Three days later, nothing had changed.
No that is not a repost of picture one, that is me missing my FG again. Tonight I am attempting Option 2. I added the yeast and will let it sit for about a week. Why won’t I be checking in on it? Glad you asked! Rachel and I are taking our long awaited trip out to San Francisco to celebrate me getting old. So until the next time, Prost!


Sunday, October 30, 2011

FRIDGE'S HERE!

Since deciding to upgrade to 5 gallon batches I was faced with the age old question of whether to bottle or keg. Well not so much as forced to pick but now free to choose. After experiencing the pains and joys of bottling previously I decided to make the trip into kegging.

I decided that if I am going to keg I am going to go all the way and make a nice kegerator. All I needed was to find a refrigerator to turn into one. Sounded easy enough, just to get onto Craigslist and find one right? Not so much. One of the down sides of living in suburbia is the fact that everyone close to me was selling Stainless Steel or French door fridges. Neither of these was what I needed, they were also out of my $150 price range. After two weeks of looking on Friday there it was! A decent $150 fridge that wasn’t too far away. I was able to call the guy and on Saturday I went and picked it up.


Now, it isn’t just enough to have the plain old garage beer fridge. No, I need a garage kegerator. With this in mind I purchased a conversion kit from Midwest Brewing Supplies.


With all the supplies the Sunday Afternoon project was set. I would have done this Saturday but as usual Texas A&M Football ruined any chance of being productive after that game. So with that I set out prepped to spend hours converting the fridge. Luckily I was wrong, way wrong. In total the project took about 45 minutes. Most of which was spent admiring how well of a job I did.

First I had to drill the hole for the tap. I choose to place the hole on the left side of the door in preparation of another keg (eventually).


And in reality that was the only tough part. After tightening some bolts the system was set up and ready to go.


After placing on the drip tray all that is missing is beer.


Hopefully later this week some progress should be made on the beer thing. Till then, Prost!

Wednesday, October 26, 2011

Brown Ale Brew Day

Wow! Going into this I was pretty weary of what would/could happen but the entire process went so much better than expected. There was really only one “Oh No!” moments and even that wasn’t all that bad. I think a lot of had to do with having another set of hands there courtesy of my wonderful wife Rachel.

The Brown Ale kit from Midwest Bewing Supplies came complete with almost everything I would have wanted *cough* hop sack *cough*and had fairly good instructions.

The first thing that signaled this might go well was how easy it was to keep the steeping in the desired range. Although, getting it to that range was a real pain. One thing I did not take into account was how hard it would be heat and then boil 4 gallons of water. Turns out is much more difficult and time consuming than a can of Green Beans (who would have guessed?).

Once the grains were steeped we had the “Oh No!” moment. With Rachel stirring I went to add in the malt extract which came in a mini-milk jug. I was a pouring the extract in there went the collar from the jug. We were able to retrieve it fast and this shouldn’t affect the final taste.


Boiling is the most boring part of brewing all you can do sanitize, sanitize, and sanitize in prep of what comes next.
Cooling the wort was our biggest pain point. We did not have enough sink space to cool it effectively. In total it ended up taking about 40 minutes to finally get the wort cool. A positive from this is Rachel now knows what she is getting me for my birthday/Christmas, a Wort Chiller (ooo, ahhhh).

The Original Gravity on the instructions said to be in the range of 1.444 – 1.448 we hit 1.446 (YES!).  It is now in the fermenter and hopefully soon we will start seeing good progress made by the yeast.

So with that, the Brown Ale is done for awhile and now all we can do is sit and wait and wait and wait…

Prost!

Monday, October 24, 2011

The Beginning

So I have decided to take the next step in the home brewing adventure. I started out last year with the Easy Bake Oven of home brewing, Mr. Beer. After several batches I decided that this worthwhile (read money worthy) hobby. Now it is time to take the next step and start making full 5 gallon batches. I aim to use this blog as a way to document my progress, brews and general thoughts. So where do we go from here?

1.      I have my kit ready to go and so tomorrow is official Brew Day 1. I picked up a 2 Stage Fermentation Kit and a Brown Ale recipe from Midwest Supplies. Hopefully in the next few days I have a write up of how Brew Day went.  
2.      I’ve done the bottling thing and have while it was fun, time consuming, space eating, and boring it is time to move on. I have ordered my Corny Keg system and am ready to convert a fridge into a Kegerator. If only I had a fridge. Oh well, that isn’t needed for another three weeks and another blog post.
3.      Enjoy my brew and post.

So I hope you enjoy my write-ups and ramblings as I take the journey. Prost!