Tuesday, May 8, 2012

Homebrewing Meets Pinterest

Homebrewing and Pinterest. At first glance you might not think these two have much in common and most of the time you would be right. At the heart of both of these is simple solution to problems and after fully stocking the kegerator an interesting problem presented itself. One of Rachel’s friends was getting married and several people would be staying with us. The problem I saw was, how was everyone going to tell which beer was which? Luckily Rachel had a very good solution thanks to the popular website Pinterest, magnetic chalkboards. The idea seemed simple enough, spray paint some chalkboard paint on some store bought boards, glue on magnets and boom, magnetic chalkboards. All the supplies were bought from Wal-Mart for about 10 bucks.

Spray painting was a breeze. Applied two coats and called it good enough. The magnets were a breeze too.


Once the boards were done it was time for my “art skills” to shine through


The finished product.
Now that all the taps were installed and identified it was apparent that one last thing was missing. A new drip pan to finish it out (for now) and make it look professional. That was too much work for this day so, till then, Prost!


Wednesday, April 25, 2012

Tapping the Stout

After the Stout had been in the keg it was time for a taste test. It pours very dark, almost pure black. It has a nice dark brown head to it, although it disappears quickly. It has a great taste, a little bit of roasty-ness to it. Overall a great tasting beer!

Now this has lef tme with an interesting problem. With four beers on tap how will guests be able to tell which beer they are about to pour? More on that next time. Prost!

Tuesday, April 3, 2012

Kegging the Stout

After brewing the stout it sat and fermented for four weeks. Once there the fermentation stage was complete it was time for my second favorite thing about brewing, kegging. Why is kegging my second favorite? Because drinking is my first and this is the last active step before that can happen. Transferring from the fermentation bucket to the keg presented a new challenge this time around. Typically when you are transferring you want to stop before you get to the “Yeast Cake”. The yeast cake is where all the byproducts of fermentation settle out. When you are bottling or kegging you don’t typically want to have any in your beer. It isn’t bad or bad for you but it can make cloudy beer. The easy way to not get any into your beer is to stop just before you get there. Unfortunately that is hard to do when your beer is pitch black.
The simple solution to this is to tip the bucket before you start to drain. So with that done it was time to transfer.
It’s always easier to transfer with a homebrew (or two)
Tipping the bucket allowed me to stop just before the sediment got sucked out.
With all the beer in the keg into the fridge it went. This was a bit more challenging because, drumroll please, the fridge had finally been filled.
It was a little bit of a squeeze but all the kegs fit in there just perfectly, now it was time to wait while the beer carbonated. Till then, Prost!

Monday, March 26, 2012

Stupidly Simple Stout Brewday


Wow, time flies when work is so much fun. Although my blog has fallen behind a little bit, luckily my brewing has not. Going to try and catch up in the next few weeks and to get started I need to go back in time to February. As I thought about my next brew I looked at the weather and a cold snap was coming so I decided that the best beer for the cold was a stout. After searching on Homebrew Talk I found a fairly simple stout recipe, so simply it was Stupidly Simple.

After getting the grains and supplies from Austin Homebrew it was time to brew. After letting the grains mash for an hour it was time to drain.

After the initial drain and sparge were complete, I set about for the boil. It was pretty cold but I had the fire and some coffee to keep me warm
There is an old adage that a watched pot never boils. I proved that wrong, way wrong. Just as I was about to get comfortable in my folding chair the foam from the wort started to reach the top of the pot. After removing the wort from the flame I turned to another old remedy, a wooden spoon on the top of the pot to avoid a boil over. Not sure if it worked but I did not have another problem with a boil over.
Once the boil was done it was into the fermenter but not before a sample gravity reading.
Now it was time to wait for the fermentation to complete, more on that soon though.

Prost!

Sunday, March 4, 2012

Adventures in Cold Crashing

Since my last post the weather here had warmed up, the beer had completed fermentation and that could only mean one thing, it was time to keg and have a round of Kolsch. This time I was going to try something a little different, it was called “cold crashing”. Cold crashing is the process of cooling your beer before you bottle or keg it. What this does is it causes yeast particles that are floating in your beer to cool down and “crash” to the bottom of the ferementer. This will allow for clearer bear when taking the beer from the fermenter to the keg since more particles are at the bottom of the fermenter. Now you are probably asking, how do you cool a 7 gallon bucket? Easy, you put it in the fridge.

After two days in the fridge it was time to keg.

After draining the beer into the keg it was pretty apparent that the cold crashing had worked just by the amount of sediment in the bottom of the fermenter. It looks green because of the hops, hops are green.

After filling the keg, it went in the fridge and about a week later it was carbed up and ready to drink.

So how did it taste? At first sip the beer had a very pronounced grain taste (duh, its all grain) but this was something more as if you took a scoop of grain and put it in your mouth. Luckily this has mellowed out since then and now this is great light and crisp beer perfect after mowing the yard or just sitting around with friends. Till the next brew, Prost!

Monday, February 20, 2012

Family Portrait


Not a lot is going on right now, one beer is in the fermenter and another is on the way. The bridge the gap I am posting this picture from when my brother visited me a couple of weeks ago. I was able to snap a picture of my first three beers. From left to right, Ryen's Pale Ale, Basic Brown Ale (RIP), WTF Winter Warmer,

Saturday, February 11, 2012

All Grain, No Pain

My beginner’s journey of extract and partial mashing was over and it was time to put on my big boy brewing pants and take a try at all grain brewing. For those unfamiliar with AG (All Grain), it is a brewing process where you extract the sugar directly from the grains (Barley, Rye, etc.). This is different from Extract and Partial Mash because in those brewing techniques the majority of the sugars is extracted from the grain and delivered to you ready to boil and brew. Think of it as Hamburger Helper vs. made from scratch pasta. There is a step up in equipment when it comes to doing AG but this was helped by a brewing friend in McKinney who graciously let me take his Mash Tun, but more on that later.

For my first AG beer I decided to go with a Saint Arnold’s Lawnmower Clone. This is a Kolsch style and with spring approaching it sounded great.

The first part of AG brewing is to extract the sugars from the grains. This is done by letting the grains steep in hot water similar to what happens when you make tea. For this recipe the grains needed to steep for one hour. For that hour you need to keep them at approximately 155 degrees Fahrenheit. The easiest way to do this is take an orange water cooler and let the grains sit in there. This was something I didn’t have but thanks to Chris, he let me have his.

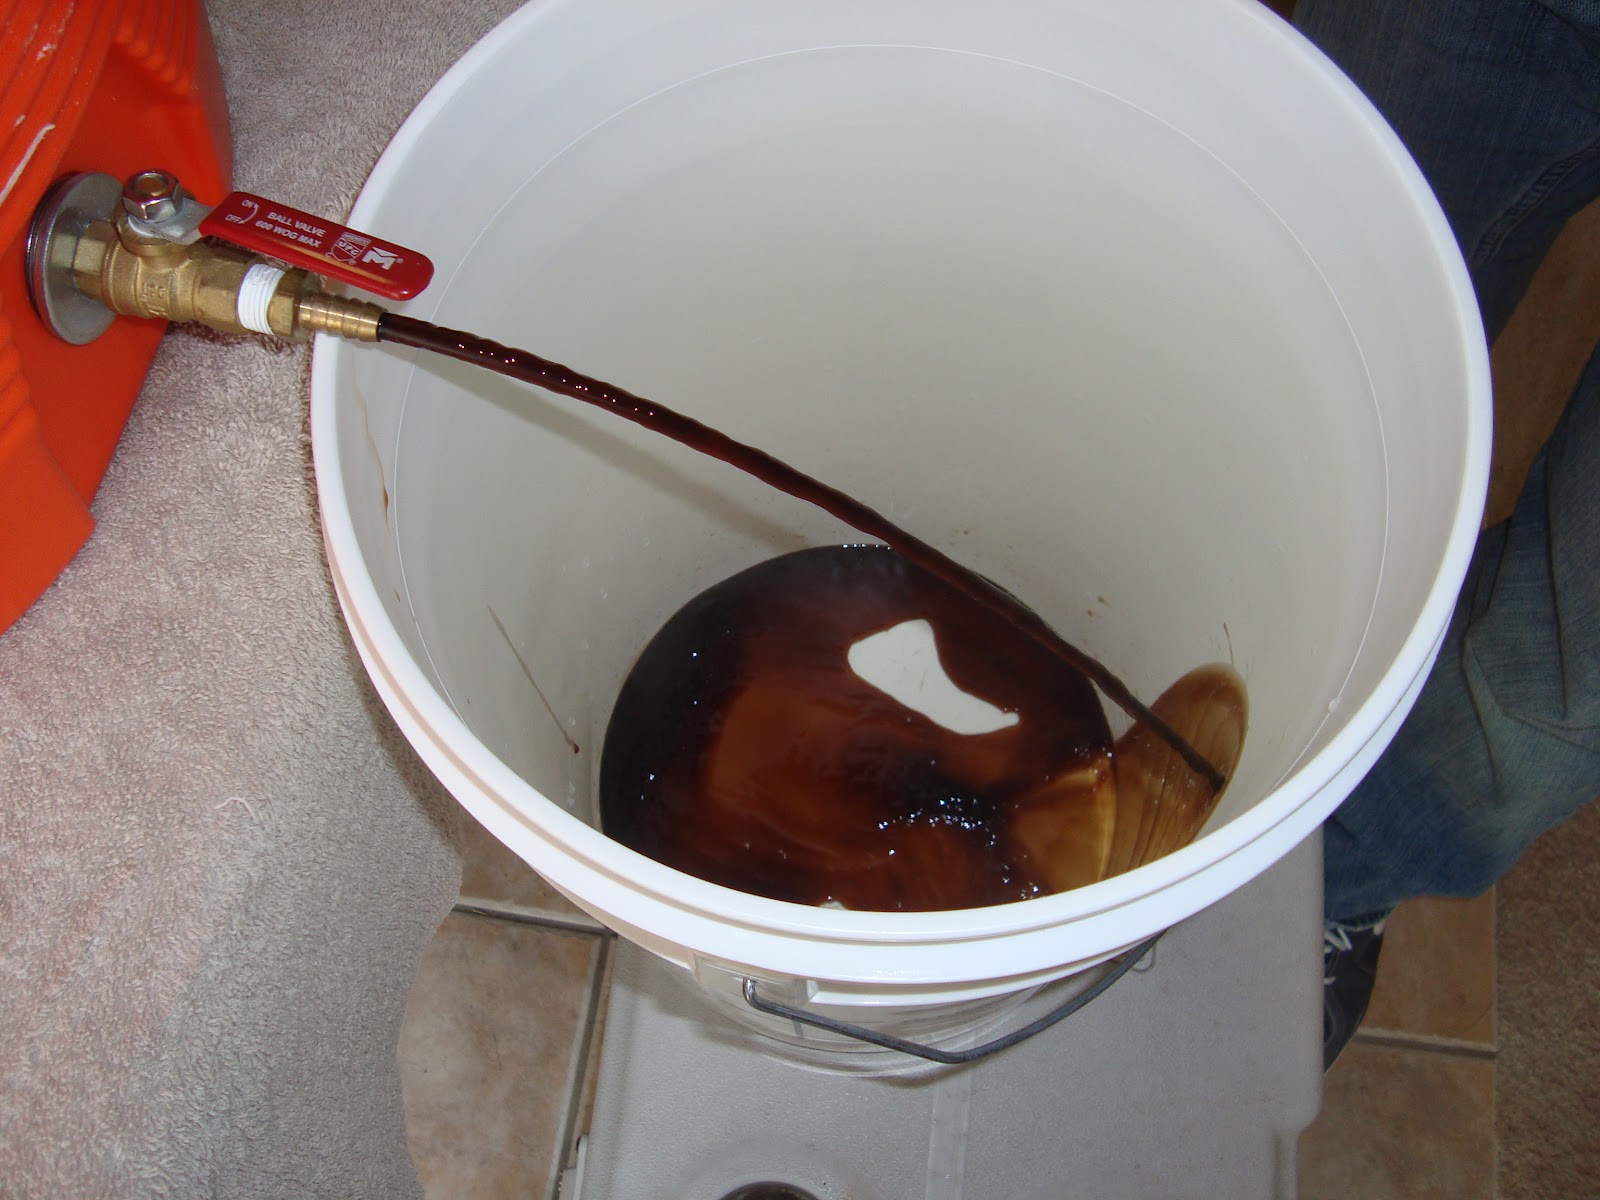
After letting the grains steep you need to drain the mash water. Before you can really let it flow out you have to “Vorlauf”. This lets you take the sediment that is at the bottom of the cooler out and put them onto the top.


After draining the mash water there is still some sugars left on the grains. To remove these you need to “wash” the grains. This is done through a process called Sparging. I prefer to batch sparge, or dump a lot of hot water in. After adding more hot water, vorlaufing and draining it was time to boil.


Due to large amount of water used for AG I made the switch to using a propane burner. Also due to large amount of water was my first experience with a near boil over. Luckily I got the brewpot off just in time.
Don't worry, the green is from the hops

After boiling and cooling the wort, I took my gravity reading. Unfortunately I missed the target OG by a couple of points, nothing too crazy though. I then pitched the yeast and said goodbye to the Kolsch for a couple of weeks.

I was fairly impressed with how simply my first AG batch went. Several lessons were learned but overall it wasn’t too bad. Can’t wait to try this one out!.

Saturday, February 4, 2012

RIP Little Buddy


Looks like it’s time to say goodbye to the first beer I brewed. It was nice knowing and drinking you.

Monday, January 23, 2012

Winter Warmer – High Gravity, Bye Extract

Thanks to a fellow home brewer I finally have all the equipment necessary to do All Grain brewing, but before I could attempt this I had one more extract brew to complete.  I had ordered a Winter Warmer kit from Austin Homebrew Supply after being inspired by Rahr’s Winter Warmer. The kit came complete with lots of grain and lots of extract, nine lbs of Extract to be exact.
This brew was similar to others that I had done before but with one small change. For this beer I would use the oven. Why the oven you ask? During a partial mash you need to soak specialty grains in hot water (150° F) for 45 minutes to extract sugar and flavors from the grain. Instead of trying to regulate the temperature on the open stove for 45 minutes I decided to cheat and put my brewpot in the oven after warming it to 150°. Turns out this was a lot easier than trying to regulate on the stove.

After this was done it was time for the boil and the addition of hops and the liquid malt extract. It was a big surprise to me when I read the package to see that the LME was a light extract. This surprised me because the Rahr version of this beer was a Dark English Ale and adding the Light LME would make this beer more copperish. Oh well, in it went.
Once the boil was over and the Wort was chilled I took a gravity reading (OG). The Hydrometer read 1.077; this was going to be a strong beer. In simple beer terms the higher the gravity after boil the stronger the beer. For math types use this formula: (OG-FG)*131=ABV, in my case (1.077-1.019)*131= 7.6% ABV. For reference a Miller Lite is 4.2%.

After putting in the yeast I sealed up the fermenter along with my extract brewing days because up next was the coveted All Grain method of brewing, but more on that later. Prost!

Sunday, January 15, 2012

Ryen’s Pale Ale Kegging and Tapping

Been awhile since the last post, unfortunately work is getting in the way of my writing, funny how that happens. Luckily it hasn’t stopped any of the activities associated with brewing. In this case the kegging and tapping of my Rye Pale Ale (RPA).
I knew this was going be a great beer when I took the first final gravity reading three weeks after putting it in the fermenter. The recipe had called for a FG of 1.012 and it was hit perfectly!

 With the FG reached it was time to keg!


MMMMmmmm... Yeast Cake
Since so much time has passed since my last post I was able to go ahead and sample the RPA

What a great beer! It’s crisp, light, hoppy, just wow! Now its on to the next brew, since it is starting to get cold outside, I think I am going to need a nice dark beer to warm up with. Till then, Prost!

Wednesday, January 4, 2012

Homebrew Home Improvement Part II

This is a big post, not just in size but in what it means to me as a homebrewer. At the end of this post I would have completed the list from this post and completed the first Homebrew Home Improvement post. This post also represents the culmination of a lot of hard work and planning. Being able to have multiple taps pouring delicious beer has been a pipe dream ever since I started. In other words, this is kind of a big deal. So without any further interruption let’s get started!
The goal of this post was to rig my fridge to dispense, not one batch of homebrew but four. In order to do this I would need four kegs, a way to run air from a central CO2 tank to all four kegs (via a four way manifold), a tap for each keg, connection for the in and out lines and the hardest part, the lines themselves. I know this is a little difficult to imagine so I have included a great picture from Keg Connection:

Unfortunately, I did not by this kit and it did not come fully assembled. This was a bit of a problem since I had never attempted anything like this.
The first and most obvious issue I ran into was that the beer line is 3/16 of an inch, the metal barb that it needed to fit over was 1/4 of an inch. For those like me, the issue is that 3/16 is smaller than 1/4. So how do we fit this? The fine folks at Homebrew HQ suggested dipping the ends in hot water to make them more flexible to fit around the barbs. After 3 or four attempts there was zero success. Then my beautiful wife had an idea, what about a hair dryer? It sounded crazy but the concentrated heat made the hoses into putty, easily fitting over the barbs.


Soon enough all hoses were connected. All that remained was to hookup up the newly redesigned system to the CO2, turn it on and cross my fingers there were no leaks. With the gas on the most wonderful noise was heard, absolutely none. With the gas good to go it was time to install some new taps.
The tap installed similar to the first, simply drill a hole in the fridge door and attach the hose. This was just as simple as the first time and soon enough the second tap was installed.


It was at this time that I had a revelation, why install taps for beer that isn’t there? Since I currently only had one keg in the fridge with another on the way I would not be using any of the other taps soon. So I put away my tools and called it a day. There would be more to do soon as I had to fill a keg for my new tap. Till the next post, Prost!

Monday, January 2, 2012

New Year, New Kegs

What a fantastic whirlwind the holidays are. SWMBO and I went all over the great state of Texas. Visiting our families in South, North East, West and Central Texas as well as visiting friends in Houston, really put a ton of miles on our vehicles and gave us the opportunity to get some quality time with people we haven’t seen in a while. While all this traveling was amazing it didn’t lend itself to brewing or any beer related activities (save for drinking of course).  
With the New Year here I had a list of three things to accomplish while I was off of work:
1.       Find Kegs
2.       Complete the 4 Keg Setup
3.       Brew a new beer.
Number one sounded easy enough but after 3 weeks of searching and finding 0 (ZERO!) corny kegs in the DFW Metroplex I was beginning to worry. I was finally able to get on a waiting a list at Homebrew HQ. On New Year’s Eve I got the call and picked up 3 used corny kegs!
I swear, the grass froze and that is why its brown.

By scratching off number one I had completed two of my goals from This Post. Now all I needed was to complete #2 from my list to completely take care of the old post. Unfortunately, I found out that the task of expanding was much more difficult and that will require another post. Till then, Prost!